Showing posts with label Postcards. Show all posts

Monday, March 16, 2009

Feathers

I have been doing some thinking about machine quilting and sketching feathers.... An opportunity presented itself to purchase a long arm quilting system and I thought long and hard about the possibilities of the major purchase. In the end, I decided although the price was right, the timing was not. With a baby due in just six weeks, I don't think I would be able to devote the time I would want to hone my machine quilting abilities.
But I have been thinking about machine quilting patterns in particular feathers, which I always love to see on a quilt. I am not all that great at doing them free hand. So I decided to take my sketching to the next level and do some machine quilting. I have also been inspired Patsy Thompson, who does some phenomenal free motion quilting using multiple colors of thread in one pattern. I started with a fat quarter of fabric along with a piece of extra firm batting (like the kind used in fiber postcards). I ironed in some diagonal guidelines and penciled in the curvy line to follow and went to town.
I chopped the fat quarter into 4x6 postcards and now am adding some more machine stitching. So they are turning out a bit more machine embroidered than simply quilted.

Sunday, March 01, 2009

Valentine Postcard

I received this beautiful Valentine from my mom this year. She has a Bernina Embroidery machine and is using postcards to learn how to create and manipulate the designs.


Monday, September 08, 2008

This & that

I have not been working on much just mulling over a few ideas for my next project, but mostly finishing up a few small projects. I have signed up to take slew of classes this fall at various quilt shows in the region and I hope some of those give me bit of a new direction in my quilting. Later this month I will be at the Indian Summer Quilt Show and Conference in Fargo taking classes from Ellen Anne Eddy and then later in October I have a weekend of classes with Laura Wasilowski in Medora ND.

I had a tough time deciding how to continue beading this doll I started ages ago, but it seems to be working itself out. I am going to finish up the tail with the gold beads and then do a little swirl or something on the bottom. I have a ceramic face picked out and have a few ideas for the top half.
Here is another small project that I started and it stalled a bit. I created the flowers and leaves using wire and beads twisted into little loops. The fabric is a scrap from Sew Batik. Now how to finish her off?? I think I want to form some sort of body or arms to give it a doll feel, but just not sure how I want to create them.

Monday, July 14, 2008

Hot Glue Bezel Tutorial

Thank you to everyone who responded and visited my blog. Many of you mentioned materials I have never used and now am curious and seeking them out to try.

I used a random number generator from http://www.random.org/ which gave me the number 13.

Congratulations to the winner: Debbie (Maine)

On to the tutorial: Here is the face I started with, he does have holes to sew on but I am going to show you how to create a bezel (a rim of a piece of jewelry in which a gem is set) around the face and attach to the fabric.

Supplies you will need are
  • ceramic face bead (need one? I have several for sale in my Etsy shop)

  • Hot Glue Gun

  • Hot Glue - I used clear, but I have found that there is colored and metallic hot glue out there.

  • Non stick surface to work - baking sheet

  • Spray Paint - I used Krylon Brass
Lay the face on to the non stick surface. I used an old baking sheet. Heat up the glue gun and start covering the edges with glue. Be sure to make some loops and holes with the glue that can be used later to sew down to the fabric. Do you remember the Spirograph toy when you were a kid? That was what I had in mind to create the bezel. I did find this Spirograph drawer that you can play with on the web here.
Anyway back to my bezel. Loop the glue around be sure to go on to the porcelain face and the flat baking sheet surface. Now you let it dry. Here is what mine looked like. Do you see that hair like string of glue? After it was dry I used some scissors to snip a few of those off and clean up the piece.


After the glue was dry, I removed the face from the glue bezel...


Next (I did not photo this part) but I put down some freezer paper and sprayed painted the hot glue bezel with Krylon in a brass color. I should note, I only sprayed the top of the hot glue, since the glue is clear it did not seem to show any parts that were not painted.
Here is the glue and the face put back together. A closer look. I decided after I started sewing everything on to the postcard that I also wanted the holes covered up.Here are a few pictures of my postcard in progress. The face is about 1/2 inch thick. I selected the floral fabric so the face was the center of a bloom. I attached the fabric to the extra firm stabilizer and then started beading over the bezel to attach to the fabric.

And here is the finished card. I did go back and add some hot glue to cover the holes. Which presented a problem, how to spray paint. I opted for a brush and just sprayed a puddle of the brass paint on to some freezer paper.
A few observations. The gold paint does not adhere completely to the glue and with too much manhandling it will flake off some. Also if you scrap the glue with a needle the paint will come off.

Wednesday, July 09, 2008

Giveaway

We (my mom Susan and I) have been busy adding new items to our Etsy site.


My mom creates the most unique porcelain faces and pendants you will find. If you have never worked with porcelain, it is smooth and lightweight and incredibly hard.

Not sure how to use or attach a ceramic face to your quilt or art doll?

This postcard was created by my mom using a medium size porcelain face surrounded by loops of wired beaded flowers. Tutorial in the works.


Here is the postcard I have been working on. The ceramic face is surrounded and held on the fabric by the lacy gold material. Can you guess what it is? Leave a comment by Monday morning July 21st and right or wrong, I will enter your name in a drawing for the finished postcard.


Stay tuned in for a tutorial on this technique, it's hot!

Wednesday, April 02, 2008

Postcards

A bit of a deviation from my usual postcards, I thought I would try something a little different.

And something a little more typical from me. This fabric really caught my attention at the quilt shop. Not something I usually pick out, a bit busy, but I though it would make some beautiful embellished post cards with some beads and fluff added. And I was a bit surprised when I found out the designer......bet you will never guess.....


Friday, January 18, 2008

Day of sewing

With the holiday (MLK Day), it has been a day to indulge in sewing.

I finished the last two pieces in the pay it forward challenge. Now to get the addresses and drop them in the mail. And I have been working on a new sunflower piece. I had it on my design wall for quite some time working on the layout. The vase still needs some work and I have a few more flowers to finish stitching. And then it is on to adding yarn......


Monday, December 31, 2007

Long Weekend

With a long weekend off of work, I created a few more leaf inspired postcards. Doing a little painting has been fun.


I have also been working to finish up a few fiber collage postcards (to complete my PIF gifts) and experimenting with some embroidery stitches, the pistol stitch on the left, the basque on the middle card. The card on the right is the detached chain and has been in progress for awhile and I am just getting around to putting on the finishing touches.

Wednesday, November 28, 2007

Tis the season...

I am starting to feel a little jolly and it helped to create a few holiday postcards.


Wednesday, November 07, 2007

Under the Sea Postcards

These three postcards have been in the works for quite sometime and I finally got down to putting on the finishing touches of yarns, beads and ribbon.

The background fabric is made from silk fusion fused over a blue or lavender piece of fabric.

On the first card, the big lavender blob is a ceramic bead of sorts, that my mom made. Doesn't it make a great piece of underwater embellishment? Next time I am home I will have to snag a few more.

My favorite touch is the tiny fish I created. On the second card the fish are done with two square cut beads and on the third they are done with a twisted bugle bead. Click photo for a larger view of the postcards.

I also experimented with various stitches for the border, zig zag, button hole and a straight stitch. I like the zig zag and the buttonhole the best.


Wednesday, August 22, 2007

Landscape Postcards

Two books have perked up my interest in fiber landscapes along with working on my larger landscape
Luminous Landscapes had techniques for using paints to achieve a desire look and Nature's Studio uses fabric prints and manipulation to express nature.
As I work on my larger landscape I have also been creating smaller landscapes. On these postcards, I tried to made careful consideration on fabric color and print as well as placement and size to create a simple yet effective design. I think the first one is a hit and the second is a bit of a miss. On the first one, I like how the blue batik, gives the sky a stormy look.


Thursday, July 19, 2007

Tyvek Postcards

I tried a few different technique with the tyvek. This time I painted the tyvek, placed it over a fabric and quilted it to the timtex then gave it a blast from the heat gun. I haven't discovered anything yet with the tyvek that I would like to incorporate into a quilt, but it sure is fun to play around with. The first two cards, I used a base fabric that I had previously foiled, I like the shinny bits that show through.
On this card I used a layer of angelina fibers, not the best results. The Angelina really dulled when I burned the tyvek.

Monday, May 21, 2007

Postcards

I had quite an art productive weekend with several finished projects to show for it. In addition to the purses in my previous post, I also completed a few postcards. A few weeks ago Jenny and I met at Terri's house for an afternoon of silk fusion. It was fun and easy. I made several small sheets with the intention of making postcards.
I really like the wispy edge of the silk fusion.
Purple Pebbles
Flow
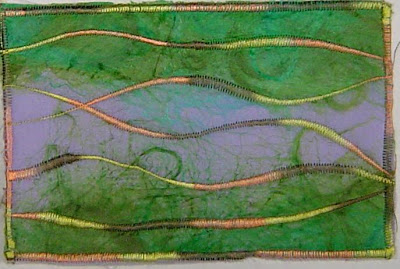
This postcard was an experiment in just what can I make my ol' 1990s era Kenmore sewing machine do. It was definitely a task in hand eye coordination. One hand was on the width control while the other guided the card through in gentle waves. My Kenmore has a very limited number of stitches and a limited length and width, but I am please with the wavy zigzag it produced.
Current
For this card I just played around with a free motion stitch with swirls.
Beaded Swirls

Friday, March 30, 2007

Postcards

I have been working on a series of postcards for an art2mail group exchange and when I set them out to photograph, I discovered and interesting pattern emerge.

Thursday, March 29, 2007

Tyvek postcards

A few weeks ago, Terri and a good friend Jenny got together for an art quilt play day and messed around with Tyvek. I made my experiments into postcards and used some dryer sheets I had dyed. This first one is ok, I think it could have used some more beading, but since it was just an experiment I stopped myself from spending too much time.


The second postcards, I though looked something like a flower but a few have said it looks like a dress. I liked the colors on this one. I used Jaquared metallic fabric paint on most of my experiments. At first I was using an iron to apply the heat to the tyvek. Worked ok, but it was difficult to see what was happening. A few of the experiments got a little too much heat. We found that using a heat gun with the tyvek sandwiched in between a white non stick pressing sheet worked great and the heat was better directed and the tyvek remained flat.


For this piece, I painted the tyveck and the did a little free motion stitching with gold thread and then zapped with the heat gun. I then attached it to the postcard using the same thread and some free motion stitches.

Our next art quilt play day we are going to try silk fusion. Can't wait.

Tuesday, February 27, 2007

Recent postcards and TAST work

I have continued to work on some postcards. I have been experimenting with a landscape theme. I love the orange fabric with dots.


Here is the near finished Buttonhole TAST postcard


and another TAST postcard done with the Cretan stitch.


and the detached chain

Friday, January 26, 2007

Some Recent Postcards

Little one brought home the stomach bug from day care and most of the last two weeks has been recovering and catching up. I finished up a few postcards....
Herringbone Flowers
Part of the TAST weekly challenge.
Funky Flowers
Another take on one of the TAST challenge. I used the buttonhole stitch around the flowers.
Sunflowers #2
Prairie Landscape
Prairie Night

Monday, January 15, 2007

TAST - Buttonhole

The stitch for the Take a Stitch Tuesday was the buttonhole stitch. I experimented on one of my fiber postcards......

Friday, January 05, 2007

TAST - Herringbone

Sharon from in a minute ago has started a year long adventure of trying out a new stitch every week. The first stitch to explore is the herringbone. I decided I would try to incorporate the weekly stitches in what ever I happen to be working on at the time. Lately it has been the floral collage postcards. This post card is still in progress and I am pleased with the free form herringbone stitch I used.

Sunday, December 31, 2006

Finished postcards

I put the finishing touches on the collage postcards I have been working on.

Collage #1

Collage #2

Collage #3