Showing posts with label Tutorials. Show all posts

Wednesday, November 27, 2013

The Joy of Wine - Merlot Santa

I am addicted to tiny knits.  I found a pattern for Tiny Christmas Mitten on Ravelry and just had to knit them up....

Adorable, aren't they.  So what to do with some tiny mitts,  well dress up a wine bottle.....


First, I had a nice evening polishing off the entire bottle of wine.

What you need...

  • Fingering weight yarn,  I used Knit Picks Palette in Cream and Hollyberry
  • Size 1 (2.25mm) DPN
  • Wire (I used floral stem wire)
  • Tapestry Needle
  • Wine Bottle 
Knit up two mittens using the Tiny Christmas Mitten pattern. 

For the scarf cast on 18 stitches  and knit in the round for 2 inches then decrease by 4 stitches.  Continue knitting in the round for 10 more inches then increase 4 stitches and knit 2 more inches.  About 5 rounds in, I added a row of cream, then again toward the end of the scarf as well.

Once you are finished with the arms, insert the wire in the the scarf tube,  I happened to have some floral stem wire on hand. I used my fingers to create a hook shape on each end (so the pointy end of the wire would not poke through the mittens).
Then I attached the mittens to each end of the scarf using the cast on or off ends.  Any excess ends I just threaded through and stuffed into the mittens and scarf.

For the Hat cast on 40 stitches in a cream color and joined in the round.  Knit a 2x2 rib for 1 1/2 inch then switch to the red yarn and just knit around for approx 1/2 an inch.  To decrease I divided into 5 sections of 8 stitches each.
R1: (Knit 6, K2tog) repeat around (35 sts)
R2 & 3: Knit
R4: (Knit 5, K2tog) repeat around (30 sts)
R5 & 6: Knit
R7: (K4, K2tog) repeat around (25 sts)
R8 & 9: Knit
R10: (K3, K2tog) repeat around (20 sts)
R11 & 12: knit
R13: K2tog around (10 sts)

Cut yarn and use tapestry needle to thread yarn through remaining stitches. 

To finish off the hat, I added a finger pompom.  Just wrap some yarn around two of your fingers about 30 times, remove and tie some yarn around the center.  Then clip all of the loops and fluff up and attach to hat. 

Thursday, November 21, 2013

Holiday Sweater Ornament


I have been on a mission to find the perfect knit ornament to make for friends and family this year.  What I had in mind was a tiny sweater with a snowflake and the year.  After several hours searching Ravelry and a few false starts I knit up the Tiny Holiday Sweater Ornament a free pattern from Knit Picks.  It is truly a lovely little sweater, but much too time consuming to make in mass quantity.


Not really finding what I wanted on Raverly,  I came up with my own 

Knit Picks Palette in Hollyberry and Cream

Holiday Sweater Ornament

What you will need:

  •  About 30 yards (will more than get the job done) of fingering weight wool and about 3 yards of contrasting color to embroider the snowflake and year.
  • Set of 5 Double Pointed Needles in size 1 (2.25mm)
  • 2 large safety pins or waste yarn
  • Tapestry Needle
Finished measurement:  2 ¾ inches long and 2 inches wide at the body of the sweater

Directions (sweater is knit top down) 

CO 20 sts on 4 DPNs  (placing the stitches as follows:  Needle 1: 6 sts Needle2: 4 sts Needle 3: 6 sts Needle 4: 4sts)

Join and knit a 1x1 rib (K1, P1) for 3 rounds.
Knit one round

Increases

Round 1:  (K1, kfb, knit to next to last stitch on Needle, kfb, k1),  repeat on each Needle.
Rounds 2 & 3: Knit

Repeat the 3 increase rounds three more times. 

Sweater Body
Knit across Needle 1 and cast on 3 stitches, place stitches on Needle 2 on to a safety pin, knit across Needle 3 and cast on 3 sts (you will need to split the stitches on to 2 Needles) , place stitches on Needle 4 on to a safety pin. 

The stitches on the safety pins will be the sleeves and the ones on the needles will make up the body of the sweater. 

Knit in the round for 10 rounds.

Knit 3 rounds of a 1x1 rib and then cast off.  I like to cast off in the stitch pattern meaning, I knit the knit stitches and purl the purl stitches when casting off.

Sleeves

Put the 12 stitches from the safety pin or waste yarn on to 2 needles.  Pick up 3 stitches in the arm pit area of the sweater and then knit the 12 on the needles.  (15 sts total)

Knit in the round for 5 rounds.

Round 6: K2tog, knit around (14 sts)

Knit 4 more rounds  

For the cuff: Knit 3 rounds of a 1x1 rib and then cast off.  I like to cast off in the stitch pattern meaning, I knit the knit stitches and purl the purl stitches when casting off.

Use tapestry needle to sew in ends and embroidery the snowflake and year. 

I don’t really weave in the ends,  I just tidy up the exterior of the sweater, then stuff the ends to the inside of the sweater. 

Embroidery

You can make up your own snowflake motif, but here is how I did mine. 

Find what looks like a stitch in the center of the sweater, and toward the top.  The center of my snowflake is 1 inch from the top of the sweater and I stitch the snowflake in the following steps. 


  1.  Stitch 4 dashes 
  2.  Add the point to each dash, bring yarn up on one point,  loop it though the dash and then down at the other point.
  3. Stich an X over the center.
  4. Add small dashes to look like dots.
 

For the numbers, I simplified each number to just straight lines and just went for it,  took me a few tries to get it somewhat even. 


Now to see how many of these babies I can crank out by the holidays!

Happy Knitting.

Wednesday, May 09, 2012

Sticky Tape Flowers Tutorial

As promised here is the tutorial on how I made the flowers on Bricks Mortar Fabric Thread.....


What you will need: 
  • Fabric for the flowers – 2 shades of yellow fabric, one for the front and one for the back
  • Steam a Seam 2
  • Flower Stencil I used the stencil Double Chrysanthemum from Laura Murray Designs
  • Sticky/Scotch Tape
  • Embroidery Floss I used DMC size 8 Pearl Cotton in Variegated Mustard
  • Embroidery Needle
  • Seed Beads I used vintage beads available from Old Stock Supply on Etsy
  • Beading Needle and Thread
  • Sewing Machine with Free Motion setting
  • Iron
  • Scissors
  • Pencil
  • brown colored pencil or fabric marker
Directions…

1.       Select main fabric and back fabric for flowers.  I like to use a lighter tone for the back so the pencil marks are easy to see. 

2.       Make your fusible sandwich.  Take a swatch of main fabric big enough to fit selected stencil and press firmly on to the Steam a Seam 2 sheet.  Steam a Seam 2 is unique that it is slightly tacky and will stick to the fabric without ironing.  Cut out the swatch and then press the back fabric to the other side of the Steam a seam.  So you will have a sandwich of fabric, fusible and fabric now follow the directions for the product and fuse the sandwich together with an iron. 
3.     Trace the stencil or draw your own flower petals onto the back fabric.  Keep in mind if the patter is not symmetrical it will be viewed from the opposite direction when flipped over to the right side of the fabric. 

4.       Cut out the petals to the flower and try to keep them in order.  It was difficult with so many petals I ended up numbering them so I would not get confused.  Also, I cut just to the outside of the pencil line so the pieces were a bit bigger.  Don’t worry too much about the pencil markings as this will be on the back of the flower. 

5.       Next lay all of the petals in place where you want to attach the flower….
 

6.       Then use sticky tape to hold down the tips, be sure to leave the center clear of tape, that is where we are going to sew them down. 

7.   On the center of the taped flower use your sewing machine and sew around in a circle a few time being sure to catch each petal with a few stitches.  The yellow flower that I am touching has the petals stitched down. 


8.     A tip I found in Allison Aller’s Crazy Quilting book was to use colored pencil to shade the flowers.  Super tip, a few lines of the brown pencil really gave the flowers a realistic touch…. Then I used the pearl cotton to create the embroidery knots to cover the machine stitches.  I used a variety of dark colored vintage seed beads to fill in the center.

Wednesday, August 24, 2011

All the world's a cup of coffee...

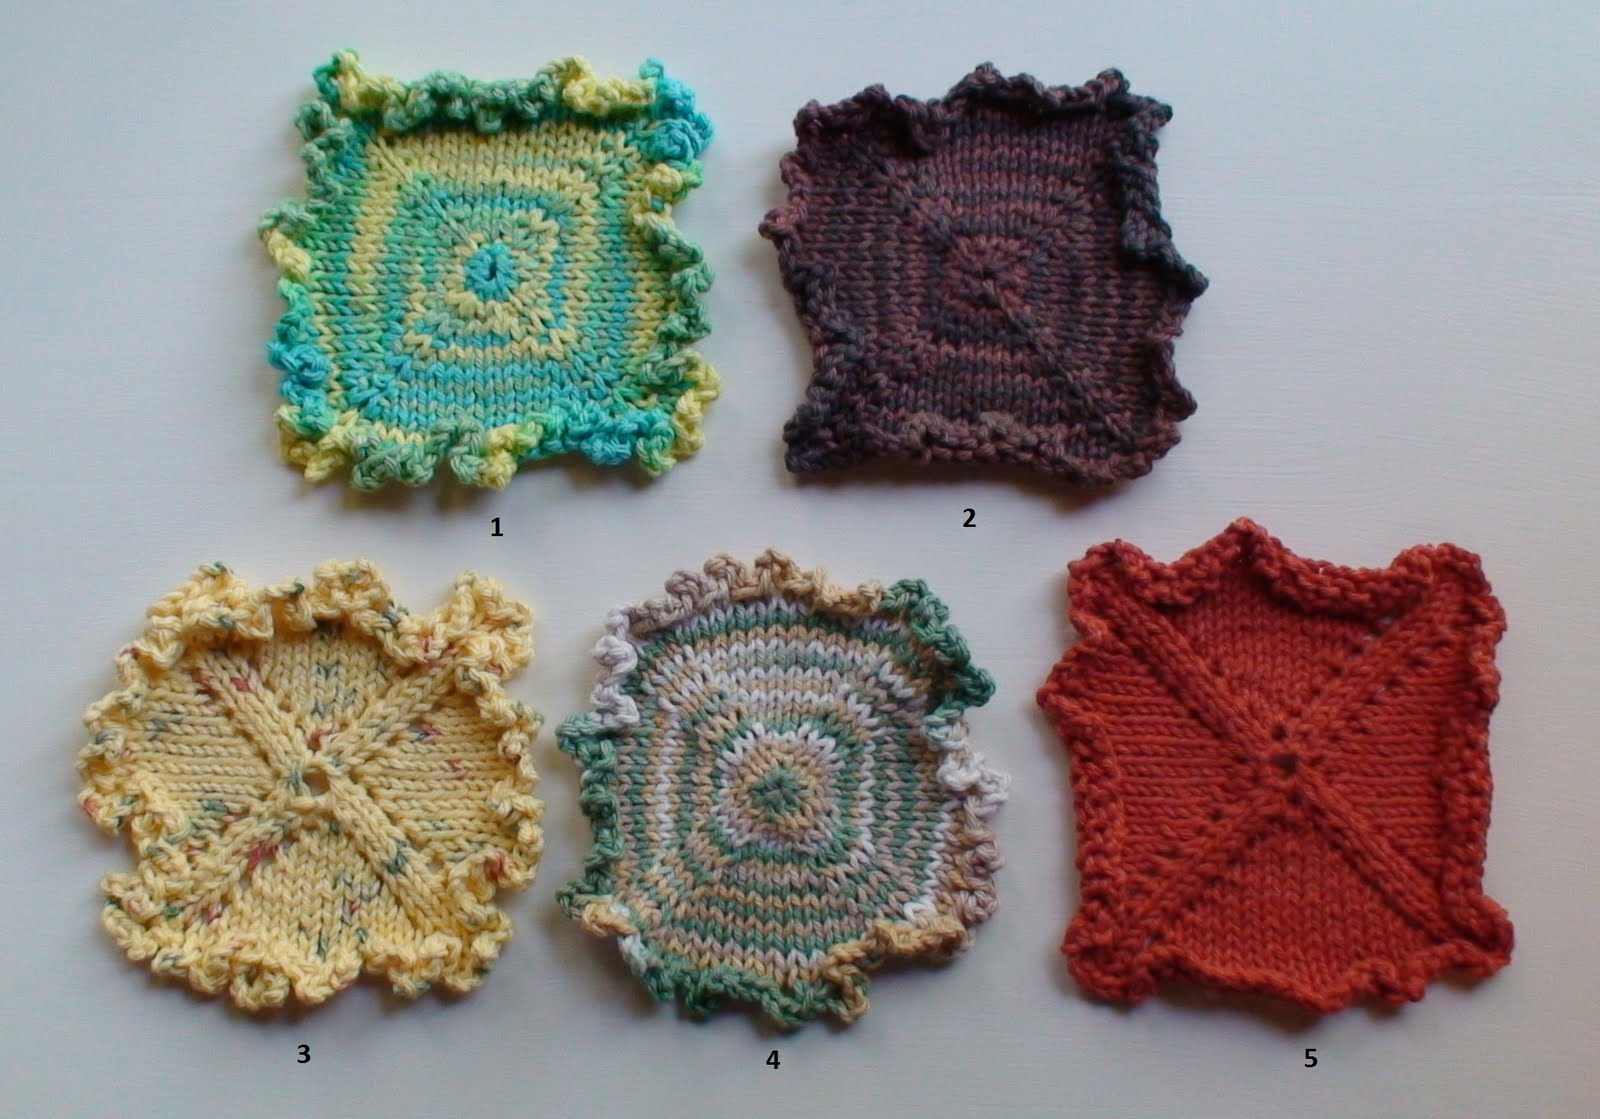
My latest free knitting pattern is ready As You Like It: Knit Coasters (download now).  It is a quick knit square with a crochet bind off and options to increase and bind off as you like it. 


Mix and match increase stitches and crochet bind off as you like it to create a frilly coaster.

Tuesday, March 01, 2011

That's a Wrap

I recently purchased a set of bamboo DPNs in nearly every size and desperately needed a way to organize.....

Made with one fat quarter of fabric a little sewing, a bit of ribbon....


I posted a tutorial on Scribd: That's a Wrap: Knitting Needle Keeper.

Wednesday, February 24, 2010

New Pattern

Here it is! My Knit-n-Felt Ornament pattern is ready for downloading, printing, knitting, felting and your wonderful creative imagination for embellishing.

I am super excited to share this pattern with you, the link is on my side bar to download the pdf. or you can find it on Ravelry.
Happy knitting, felting and embellishing.
And, if you are in need of some embellishment ideas, check out my Bead Embroidery Pattern Booklet available on Etsy. I selected 9 of my favorite embroidery stitches with directions, diagrams and loads of photos of each stitch.


Monday, February 01, 2010

Needle Punch Fan Block Tutorial

Note: I updated the links to a new pdf hosting site.

My Needle Punch Fan Block tutorial is finished and ready for you to download. I now have all of my tutorials I have posted on my blog changed to a pdf and available for download through Google Docs. Check out the links in my sidebar under Tutorials to find save and print your favorite tutorials.


This is the perfect block to try all of the seam embellishments from my Bead Embroidery Stitches Pattern booklet available on my Etsy site.

Monday, July 14, 2008

Hot Glue Bezel Tutorial

Thank you to everyone who responded and visited my blog. Many of you mentioned materials I have never used and now am curious and seeking them out to try.

I used a random number generator from http://www.random.org/ which gave me the number 13.

Congratulations to the winner: Debbie (Maine)

On to the tutorial: Here is the face I started with, he does have holes to sew on but I am going to show you how to create a bezel (a rim of a piece of jewelry in which a gem is set) around the face and attach to the fabric.

Supplies you will need are
  • ceramic face bead (need one? I have several for sale in my Etsy shop)

  • Hot Glue Gun

  • Hot Glue - I used clear, but I have found that there is colored and metallic hot glue out there.

  • Non stick surface to work - baking sheet

  • Spray Paint - I used Krylon Brass
Lay the face on to the non stick surface. I used an old baking sheet. Heat up the glue gun and start covering the edges with glue. Be sure to make some loops and holes with the glue that can be used later to sew down to the fabric. Do you remember the Spirograph toy when you were a kid? That was what I had in mind to create the bezel. I did find this Spirograph drawer that you can play with on the web here.
Anyway back to my bezel. Loop the glue around be sure to go on to the porcelain face and the flat baking sheet surface. Now you let it dry. Here is what mine looked like. Do you see that hair like string of glue? After it was dry I used some scissors to snip a few of those off and clean up the piece.


After the glue was dry, I removed the face from the glue bezel...


Next (I did not photo this part) but I put down some freezer paper and sprayed painted the hot glue bezel with Krylon in a brass color. I should note, I only sprayed the top of the hot glue, since the glue is clear it did not seem to show any parts that were not painted.
Here is the glue and the face put back together. A closer look. I decided after I started sewing everything on to the postcard that I also wanted the holes covered up.Here are a few pictures of my postcard in progress. The face is about 1/2 inch thick. I selected the floral fabric so the face was the center of a bloom. I attached the fabric to the extra firm stabilizer and then started beading over the bezel to attach to the fabric.

And here is the finished card. I did go back and add some hot glue to cover the holes. Which presented a problem, how to spray paint. I opted for a brush and just sprayed a puddle of the brass paint on to some freezer paper.
A few observations. The gold paint does not adhere completely to the glue and with too much manhandling it will flake off some. Also if you scrap the glue with a needle the paint will come off.

Tuesday, June 10, 2008

Video Tutorial - Beaded Flowers


I had several requests on how to create the beaded flowers. So I put together a video tutorial.

Lacking a bit of professional polish as well as it is obvious I could use a good manicure, I think most will be able to follow the beading stitches.

Enjoy and look for more video tutorial on www.youtube.com/user/inthefold

Tuesday, February 05, 2008

3-D Floral Motifs Tutorial

To fill in some of the open space on Bead Crazy I created some 3-d floral motifs. The three dimensional motifs are easy to make and a great way to use up the tiny ultrasuede scraps.


Petal Flowers

1. Cut petal shape from Ultrasuede about a ½ inch long and no more than 3/8 inch wide.2. Roll the petal in to a cone
3. Add some tiny stitches along the seam to hold the cone shape (you can see mine in the photo)
4. Stitch down to fabric
5. Add a stamen with a beaded fringe of a bugle bead and a few seed beads emerging from the center of the flower
6. Add a few vines using a beaded backstitch and a few leaf shapes complete the motif. The leafs are attached with a few tiny stitches at one end and then a few beads cover the stitches.

Fringe Flowers


1. Cut three strips about 3/4 inch long and as skinny as you can get them. I use my sharp embroidery scissors for the tiny slices.
2. Bundle the three strips together and secure in center with thread
3. Fold in half on the stitch and sew to fabric. I used a few stitches to hold some of the fringe exactly where I wanted each to stay.
4. Cover center bundle thread with beads. In the photo I used a #8 bead with a seed stop bead.
5. Add some beaded backstitch vines and the motif is complete. I also added some beaded knot stitches done in purple beads to give the impression of flower buds.

Tuesday, January 08, 2008

Beaded Pistol Stitch

As you may know, I have been focused on getting the basic stitches in place on my latest crazy quilt project. Coming up with all of the various stitch combinations is quite a challenge to my creativity as I try not to use the same beads and the same stitch. A change in the bead size shape and color can go a long way in making each stitch look different. Fast becoming my favorite stitch, the beaded pistol stitch can be used to form a gentle zig-zag pattern or an alternating pattern that is quite versatile.
Start with a straight stitch of 4 -5 seed beads or a bugle bead. I usually work with size 11 or 15 seed beads.

The "knot" is created with three bead stitched in a loop and the thread going back through the middle bead to hold it down.


1. Bring the needle up at point A
2. String on 4-5 beads or a bugle bead
3. Bring needle down through fabric at point B
4. Bring needle up just to the left of point B
5. To form the "beaded knot" String on 3 beads
6. Bring needle down just to the right of point B
7. Bring needle up at point C
8. Thread needle through bead 2
9. Bring needle down at point D


TIP: To achieve straight flat stitch, string on beads and push down the thread to the fabric. Pull thread taught and lay flat against the fabric. Use needle to tap the beads to position and see where you need to make your stitch. Too short and the bead arch up, too long and the bead float around.

The beaded knot stitch works great as a finishing touch on the ends of a feather stitch...


Another example of the beaded knot, done in a contrasting color the bead take on a look of budding flowers.